Deploy on the Main Network
In this series of the Luminary Edition, I will document the process of configuring your main network block producer node. Note that in order to launch a node on the main network, you must successfully run on the test network for at least two weeks. If you've been approved then congratulations, and I hope you find this blog helpful. This post with cover configuring your block producer node.
Server Specifications
You will need a really powerful server to run this on. The specs that we chose to start with are as follows:
- 12 core cpu AMD cpu @3.8 ghz
- 64 gigs of ram
- 500 gig ssd
- 4 TB raid ssd
Installing Eoseo
As I mentioned my last post, compiling the software takes forever so I was going to deploy with per-compiled binaries. This was an Ubuntu 21 system.
root@ns106991:/tmp# dpkg -i eosio_2.0.5-1-ubuntu-18.04_amd64.deb
Selecting previously unselected package eosio.
(Reading database ... 71870 files and directories currently installed.)
Preparing to unpack eosio_2.0.5-1-ubuntu-18.04_amd64.deb ...
Unpacking eosio (2.0.5-1) ...
dpkg: dependency problems prevent configuration of eosio:
 eosio depends on libicu60; however:
  Package libicu60 is not installed.
 eosio depends on libtinfo5; however:
  Package libtinfo5 is not installed.

dpkg: error processing package eosio (--install):
 dependency problems - leaving unconfigured
Errors were encountered while processing:
 eosio
But I ran into an issue, so I tried to compile it from source.
mkdir /opt/EOSIO
cd /opt/EOSIO

git clone https://github.com/eosio/eos --recursive
cd eos

git checkout v2.0.5
git submodule update --init --recursive
Run the build script ...
./scripts/eosio_build.sh -P -y
EOSIO Version: 2.0.5
Sun Mar 13 01:18:09 UTC 2022
User: root
Current branch: HEAD
No installation location was specified. Please provide the location where EOSIO is installed.

EOSIO will be installed to: /root/eosio/2.0
=====================================================================================
======================= Starting EOSIO Dependency Install ===========================
Architecture: Linux
OS name: Ubuntu
OS Version: 20.04
CPU cores: 12
Physical Memory: 65G
Disk space total: 3666G
Disk space available: 3476G
 - You must be running 16.04.x or 18.04.x to install EOSIO.
On the test network, I was able to use the latest Ubuntu long term release, but the build script insists on using this older version. It is not worth the time to hack it, so just be sure to use Ubuntu 18.04.1.
./scripts/eosio_build.sh -P -y
./scripts/eosio_install.sh

mkdir /opt/bin
mkdir /opt/bin/v2.0.5
cp /opt/EOSIO/eos/build/programs/nodeos/nodeos /opt/bin/v2.0.5/
cp /opt/EOSIO/eos/build/programs/cleos/cleos /opt/bin/v2.0.5/
cp /opt/EOSIO/eos/build/programs/keosd/keosd /opt/bin/v2.0.5/
ln -sf /opt/bin/v2.0.5 /opt/bin/bin
This time the software installed okay. At this point I would advise making a full system backup of your server. This will come in handy if you decide to configure a history node in the future. The next step is to download the boilerplate and configure everything in the config.ini file.
mkdir /opt/ProtonMainNet
cd /opt/ProtonMainNet
git clone https://github.com/ProtonProtocol/proton.start.git ./
If you have not already, you need to create a new account for your node. Then you need to edit your config.ini, editing these fields
- server address: p2p-server-address = ENTER_YOUR_NODE_EXTERNAL_IP_ADDRESS:9876
- if BP: your producer name: producer-name = YOUR_BP_NAME
- if BP: add producer keypair for signing blocks (this pub key should be used in regproducer action):
signature-provider = YOUR_PUB_KEY_HERE=KEY:YOUR_PRIV_KEY_HERE - replace p2p-peer-address list with fresh generated on monitor site: https://monitor.protonchain.com/#p2p
- Check chain-state-db-size-mb value in config, it should be not bigger than you have RAM:
chain-state-db-size-mb = 16384
Here is what mine looked like after succesful configuration:
################################################################################
# Proton tools
#
# Created by http://CryptoLions.io
#
# https://github.com/ProtonProtocol/proton.start
#
#
################################################################################


    ###########--producer--#########################
    #
    agent-name = luminaryvisn
    plugin = eosio::producer_plugin
    producer-name = luminaryvisn
    signature-provider = EOS83tLDZorE8eQDhKrZdUG21DG1jctGhEJDEKpsfKJ6kjbQHtCjg=KEY:xxxxxxxxxxxxxxxxxxxxxxxxxxxxxxxxxxxxxxxxxxxxxxxxxxxxxx
    #
    ###############################################################


    http-server-address = 0.0.0.0:8888
    p2p-listen-endpoint = 0.0.0.0:9876
    p2p-server-address = xxxxxxxxxxxxxxx:9876

    chain-state-db-size-mb = 62767 # I have 64 gigs ram so set this just under
    reversible-blocks-db-size-mb = 1024

    contracts-console = true

    p2p-max-nodes-per-host = 100

    chain-threads = 8
    http-threads = 6
    #wasm-runtime = wabt
    http-validate-host = false
    verbose-http-errors = true
    abi-serializer-max-time-ms = 2000

    #produce-time-offset-us = 250000
    last-block-time-offset-us = -300000
    # eosio2.0
    http-max-response-time-ms = 100
    #Only!! for performance eosio 2.0+
    eos-vm-oc-compile-threads = 4
    eos-vm-oc-enable = 1
    wasm-runtime = eos-vm-jit
    #END


    # Safely shut down node when free space
    chain-state-db-guard-size-mb = 128
    reversible-blocks-db-guard-size-mb = 2


    access-control-allow-origin = *
    access-control-allow-headers = Origin, X-Requested-With, Content-Type, Accept
    # access-control-allow-headers =
    # access-control-max-age =
    # access-control-allow-credentials = false


    # actor-whitelist =
    # actor-blacklist =
    # contract-whitelist =
    # contract-blacklist =
    # filter-on =


    # SSL
    # Filename with https private key in PEM format. Required for https (eosio::http_plugin)
    # https-server-address =
    # Filename with the certificate chain to present on https connections. PEM format. Required for https. (eosio::http_plugin)
    # https-certificate-chain-file =
    # Filename with https private key in PEM format. Required for https (eosio::http_plugin)
    # https-private-key-file =

    ###########################################################################
    # State History (For 1.8.0-rc1+ add to start params --disable-replay-opts )
    # plugin = eosio::state_history_plugin
    # state-history-dir = state-history
    # trace-history = true
    # chain-state-history = true
    # state-history-endpoint = 0.0.0.0:8080
    # debug mode info (https://github.com/EOSIO/eos/pull/7298)
    # #trace-history-debug-mode
    ############################################################################

    allowed-connection = any

    # allowed-connection = specified
    # peer-private-key = ["!!NEW_KEY_PUB!!","!!NEW_KEY_PRIV!!"] #create new key for private peers
    # peer-key = "!![PUBKEY]!!"


    max-clients = 150
    connection-cleanup-period = 30
    sync-fetch-span = 2000
    enable-stale-production = false


    pause-on-startup = false
    max-irreversible-block-age = -1
    txn-reference-block-lag = 0


    # peer-key =
    # peer-private-key =

    plugin = eosio::producer_plugin
    #plugin = eosio::producer_api_plugin
    plugin = eosio::chain_plugin
    plugin = eosio::chain_api_plugin

#p2p-peer-address =
#p2p-peer-address = proton.cryptolions.io:9876
#p2p-peer-address = proton.eu.eosamsterdam.net:9103
#p2p-peer-address = proton.lynxsweden.org:9576
#p2p-peer-address = p2p-proton.eosarabia.net:9876
#p2p-peer-address = peer1.proton.pink.gg:48011
#p2p-peer-address = proton-p2p.eos.barcelona:9850
#p2p-peer-address = proton.lynxsweden.org:9576
#p2p-peer-address = proton.eosdublin.io:9877
#p2p-peer-address = peer.proton.alohaeos.com:9876
#p2p-peer-address = peer1-proton.eosphere.io:9876
#p2p-peer-address = proton.eosvenezuela.io:9777
#p2p-peer-address = p2p.proton.eostribe.io:19880
#p2p-peer-address = proton.greymass.com:19875
#p2p-peer-address = proton.eosio.cr:9879
p2p-peer-address = proton.cryptolions.io:9876
p2p-peer-address = proton.cryptolions.io:9876
p2p-peer-address = proton.eosdublin.io:9877
I also uncommented the producer plugin line. Configure your systems firewall to allow ssh traffic and tcp traffic on ports 8888 and 9876:
sudo ufw allow ssh
sudo ufw allow tcp/8888
sudo ufw allow tcp/9876
sudo ufw enable
You should also take additional steps to harden the security of your server before placing the private keys on here. Be sure the change the permissions of the config.ini to read only by user:
chmod 600 config.iniObviously you ought to be running all of this under a seperate unix user without superuser permissions.
After configuring the .ini file, you need to start the node and allow it to synchronize. I tried to restore from the latest snapshot to save time, but that gave me a strange error about "snapshot can only used to initialize an empty database" which is odd because whatever database it is refering to ought to be empty as this a brand new install.
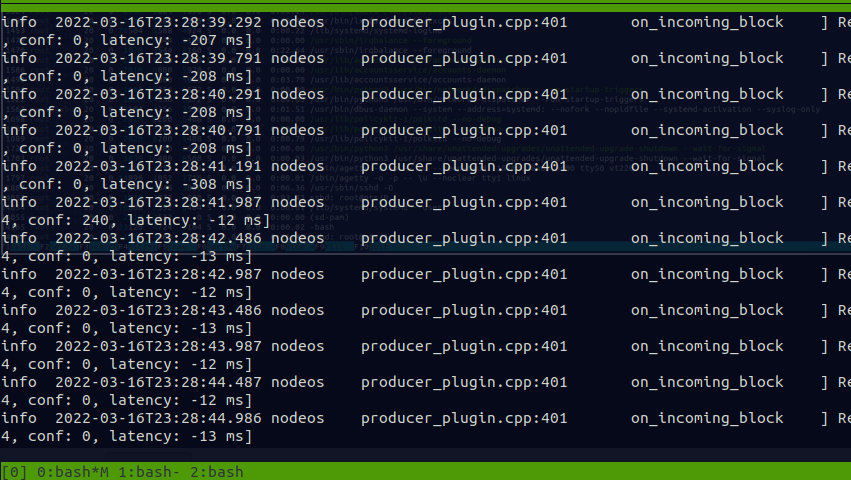
Wait for your node to synchronize. You can check the status like:
curl http://localhost:8888/v1/chain/get_info | jq
  % Total    % Received % Xferd  Average Speed   Time    Time     Time  Current
                                 Dload  Upload   Total   Spent    Left  Speed
100   796  100   796    0     0   777k      0 --:--:-- --:--:-- --:--:--  777k
{
  "server_version": "de78b49b",
  "chain_id": "384da888112027f0321850a169f737c33e53b388aad48b5adace4bab97f437e0",
  "head_block_num": 119682260,
  "last_irreversible_block_num": 119681926,
  "last_irreversible_block_id": "07223386041237476f36dd168e92c02dbf10828308ad317bed4642a8d96a4e59",
  "head_block_id": "072234d42901571c1a8bb4ce2999b357d288ab1a7d434bb35f4b3a0f40683833",
  "head_block_time": "2022-03-16T22:54:22.500",
  "head_block_producer": "eosbarcelona",
  "virtual_block_cpu_limit": 200000000,
  "virtual_block_net_limit": 1048576000,
  "block_cpu_limit": 199900,
  "block_net_limit": 1048576,
  "server_version_string": "v2.0.5",
  "fork_db_head_block_num": 119682260,
  "fork_db_head_block_id": "072234d42901571c1a8bb4ce2999b357d288ab1a7d434bb35f4b3a0f40683833",
  "server_full_version_string": "v2.0.5-de78b49b5765c88f4e005046d1489c3905985b94"
}
To know the synchronization progess, note the head block time. Finally, you can run this command to register as a block producer and you will offially be live:
eos@ns106991:/opt/ProtonMainNet/protonNode$ ./cleos.sh system regproducer luminaryvisn PUB_K1_83tLDZorE8eQDhKrZdUG21DG1jctGhEJDEKpsfKJ6kjbRQLnCT "luminaryvisn.com" 0
executed transaction: 1cfa23e3bc5c33aca5a546c9f89723b41ec76389043ce120e985c0c229906651  160 bytes  399 us
#         eosio <= eosio::regproducer           {"producer":"luminaryvisn","producer_key":"EOS83tLDZorE8eQDhKrZdUG21DG1jctGhEJDEKpsfKJ6kjbQHtCjg","u...
warning: transaction executed locally, but may not be confirmed by the network yet         ]
The next thing on our list is configuring the bp.json file which tells the network where to find your company logo and other contact details. There is a generator which you can use to create it. This needs to be at the root of the domain that you registered. See example: https://luminaryvisn.com/bp.json
You should see your logo and contact details show up on the network monitor if this is configured correctly.

Remember to put your systems kernel in performance mode as well:
echo performance | sudo tee /sys/devices/system/cpu/cpu*/cpufreq/scaling_governor
performance
That is all for now. Stay tuned for the next series which will go over configuring a history node, claiming rewards, and anything else that comes up.